Leave Your Message

How to Improve Powder Coating Surface Finish?

Powder coating has become a trusted finishing method for architectural parts, appliances, automotive components, and industrial equipment. The U.S. Environmental Protection Agency identifies powder coating as a low-VOC process because it uses little or no solvent during application. The Powder Coating Institute also highlights strong material utilization, especially when overspray recovery systems are properly maintained. These advantages matter, but they do not automatically create a flawless Powder Coating Surface.

Surface quality begins before the powder reaches the spray gun. A thin oil film, trapped moisture, or poorly prepared steel can produce craters, pinholes, and weak adhesion. Experienced applicators inspect every stage, including degreasing, phosphate or conversion treatment, grounding, powder storage, and oven calibration. Small details matter. A dusty booth matters. Uneven metal temperature matters.

Gloss alone is not enough. ASTM D523 and ISO 2813 provide recognized methods for measuring specular gloss, while visual inspection reveals orange peel, color variation, edge pullback, and contamination. A panel may meet a gloss target yet still look uneven under warehouse lighting. That is an important limitation.

Manufacturers should compare test panels under consistent lighting and record film thickness, cure temperature, humidity, and line speed. PCI guidance supports controlled process verification rather than relying on appearance alone. Still, no checklist is perfect. Real production includes complex geometries, recycled powder, changing substrates, and operator decisions. Improving Powder Coating Surface quality therefore requires measured data, practical experience, and a willingness to question results that initially look acceptable.
How to Improve Powder Coating Surface Finish?

Understanding the Factors That Affect Powder Coating Surface Finish

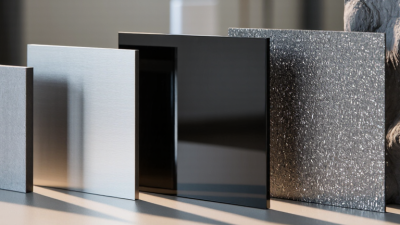
Powder coating surface finish depends on more than the final oven temperature. Substrate preparation, powder quality, application settings, and curing conditions all influence the result. Oil, rust, moisture, or silicone residue can create craters, pinholes, and uneven gloss. A clean, properly profiled surface gives the powder a more reliable foundation.

Film thickness also matters. Excessive powder can cause orange peel, while a thin layer may expose texture and reduce protection. Gun voltage, powder flow, spray distance, and grounding should be checked together. Humidity can affect powder movement and surface appearance, especially in poorly controlled areas. The oven must provide consistent part temperature, not only stable air temperature. Use a calibrated temperature probe when possible. Small gaps in measurement can create large finish differences.

Tips: Clean the substrate immediately before coating. Keep powder hoses dry and free from buildup. Test one panel before a full production run. Record film thickness and curing time for each batch. I have seen good results fail because operators trusted the oven display alone. That assumption deserves review. Even experienced teams miss contamination around hooks, edges, and weld seams. Inspect those areas closely. A slight color variation may come from uneven metal temperature, not defective powder. Surface finish improves when preparation, application, and curing are treated as one connected process.
Preparing the Substrate for a Smooth and Uniform Coating

How to Improve Powder Coating Surface Finish?

A smooth powder coating begins with a clean substrate, not the spray gun. Oil, dust, mill scale, and fingerprints can create craters, pinholes, or uneven gloss. In practical workshop conditions, I degrease the part before abrasive blasting. This prevents contamination from spreading across the surface.

The blasting media and pressure must match the metal. Excessive pressure can distort thin panels or leave an overly rough profile. A controlled texture gives the powder enough grip without showing through the finish. After blasting, I remove dust with clean, dry air. Compressed air lines should be checked for oil and moisture. Small droplets can ruin an otherwise prepared surface.

Aluminum and steel may require different chemical pretreatments. The selected process should suit the alloy, service environment, and curing system. I also inspect corners, welds, and recessed areas because they often retain grease. Masking must be secure, but it should not leave adhesive residue. Handle prepared parts with clean gloves.

Do not rush this stage.

I once accepted a part that looked clean under workshop lighting. Later, faint silicone contamination caused several surface defects. The mistake was simple: inspection was too casual. A brighter inspection lamp and a documented cleaning check would have helped. Preparation is rarely dramatic, but it controls the final appearance. Even a small missed weld spatter can become highly visible after curing.

Selecting the Right Powder Coating Materials and Application Settings

How to Improve Powder Coating Surface Finish?

A smooth finish begins with the correct powder coating material. Choose the resin system according to the substrate, exposure conditions, and desired appearance. For outdoor parts, weather resistance matters more than a perfect gloss level. For indoor equipment, a standard formulation may provide better value. Pigment and texture also affect flow. Fine textures can hide small surface defects, but they cannot cover oil, rust, or sharp contamination.

Application settings require controlled testing. Clean the metal carefully, then confirm proper grounding before spraying. Adjust voltage, powder flow, and gun distance together. Excessive voltage can create back-ionization marks, especially in corners. A film thickness gauge helps prevent thin areas and heavy edges. Follow the powder supplier’s curing schedule, using part metal temperature rather than oven air temperature. I have seen attractive panels fail because the surface never reached the required cure temperature.

Tips: Test one panel before production. Record voltage, airflow, powder output, humidity, and curing time. Keep the gun about 15–25 centimeters from the surface. Use steady passes with slight overlap. Check corners and recessed areas separately. Small adjustments matter. Also, do not trust appearance alone; gloss and adhesion tests can reveal problems that the eye misses. A setting that worked yesterday may fail today when humidity, grounding, or metal temperature changes.

How to Improve Powder Coating Surface Finish? - Selecting the Right Powder Coating Materials and Application Settings

Typical starting ranges for smooth powder coating finishes. Actual settings depend on the powder formulation, equipment, part geometry, and the manufacturer’s technical data sheet.
Process Area Material or Setting Recommended Starting Range Effect on Surface Finish Common Defect When Incorrect
Powder Selection Powder chemistry Choose a formulation rated for the required gloss, weathering, chemical resistance, and service temperature The resin system and additives control flow, leveling, gloss retention, and resistance to orange peel Poor leveling, loss of gloss, chalking, or premature coating failure
Powder Selection Particle-size distribution Use a powder designed for the intended application method; avoid excessive fines or coarse particles A balanced particle size supports consistent transfer efficiency and smoother melt flow Rough texture, uneven film build, poor transfer, or excessive overspray
Powder Storage Storage temperature and humidity Keep sealed in a cool, dry area; commonly below 25°C and protected from moisture and direct sunlight Prevents premature agglomeration and maintains predictable powder flow Clumps, spitting, inconsistent film thickness, or surface contamination
Substrate Preparation Cleaning and pretreatment Remove oil, grease, rust, scale, and dust; apply a compatible conversion treatment when required A clean, chemically prepared surface improves adhesion and reduces craters and pinholes Blistering, peeling, fisheyes, craters, and flash rust
Substrate Preparation Surface profile Use a profile appropriate to the part and specification; avoid sharp burrs and excessive roughness A uniform profile supports consistent coverage without telegraphing substrate imperfections Visible scratches, thin edges, uneven texture, or poor edge coverage
Application Film thickness Typically 60–100 µm for many general-purpose smooth coatings; verify the product specification Adequate thickness allows the powder to flow and level during curing Thin film: poor coverage; thick film: orange peel, sagging, or solvent popping
Application Gun-to-part distance Approximately 150–300 mm, adjusted for part geometry and gun design Maintains a stable spray pattern and reduces excessive powder impact on the surface Uneven coverage, back-ionization, overspray, or rough texture
Application Electrostatic voltage Often 40–80 kV as a starting range; reduce voltage for recesses, sharp edges, or previously coated areas Controlled voltage improves transfer efficiency and reduces electrical surface defects Back-ionization, pinholes, uneven deposition, or poor penetration into recesses
Application Powder output Use the lowest stable feed rate that provides complete coverage; commonly adjust within 50–200 g/min Moderate output helps maintain uniform film build and prevents powder overload Heavy orange peel, thin spots, excessive overspray, or wasted powder
Application Compressed air quality Use clean, dry, oil-free air with properly maintained filters and dryers Prevents moisture and oil from disrupting powder transport and curing Cratering, fisheyes, spitting, contamination, or inconsistent spray
Environment Booth and shop conditions Keep the area clean; commonly maintain 18–27°C and relative humidity around 40–60% Stable conditions improve powder flow, electrostatic charging, and repeatability Poor transfer efficiency, clumping, contamination, or variable appearance
Curing Metal temperature and cure schedule Common schedules are approximately 160–200°C metal temperature for 10–20 minutes; follow the powder specification Correct cure enables complete melt flow, leveling, cross-linking, and final gloss development Under-cure: low gloss and poor hardness; over-cure: discoloration or loss of appearance
Curing Oven temperature uniformity Verify multiple zones and part locations with calibrated temperature measurement Uniform metal temperature produces consistent gloss, color, and texture across the part Color variation, gloss variation, under-cured areas, or excessive yellowing
Quality Control Film-thickness verification Measure several locations on each part or batch using a calibrated coating-thickness gauge Confirms that application is within the range needed for consistent appearance and performance Unnoticed thin areas, excessive build, inconsistent gloss, or premature failure
Quality Control Visual and gloss inspection Inspect under consistent lighting; use a gloss meter when numerical acceptance criteria are required Early detection helps identify texture, color, gloss, and contamination issues before shipment Inconsistent acceptance decisions or defects reaching the customer

Controlling Curing Conditions to Prevent Surface Defects

How to Improve Powder Coating Surface Finish?

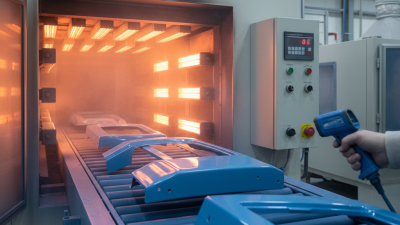
Curing conditions strongly influence powder coating surface quality. The U.S. Department of Energy’s powder-coating guidance reports that curing ovens can consume roughly 60% of a coating line’s energy. Uneven heat therefore affects both efficiency and appearance. A panel may reach the oven temperature, yet its thick corners remain under-cured. Thin edges may over-cure, causing yellowing, gloss loss, or brittleness.

Measure the metal temperature, not only the oven air temperature. Use calibrated probes at heavy sections, corners, and shaded areas. Follow the powder supplier’s time-temperature window, then verify film thickness under ASTM D7091. Poor airflow can create cold zones near the door or exhaust end. I have seen smooth parts fail after cooling because the conveyor moved too quickly. The schedule looked correct on paper. The process was not.

Tips: Map the oven every few months. Record part mass, metal temperature, dwell time, and gloss readings. Check the first and last parts of each batch. Keep a defect log with photographs. It exposes patterns that memory misses. ASTM D523 can help track gloss changes, while ASTM D3359 supports adhesion checks after curing. Do not trust appearance alone. A glossy surface may still have weak adhesion. An imperfect practice is changing several settings at once; it hides the real cause. Adjust one variable, repeat the test, and document the result.

Inspecting, Troubleshooting, and Maintaining the Finished Surface

A reliable surface inspection starts after the coated part has cooled completely. Use angled light to reveal orange peel, dull patches, pinholes, and uneven gloss. Run clean fingertips across the surface without pressing hard. Roughness often signals dust, poor leveling, or incorrect film thickness.

Measure coating thickness at several points, not just the center. Compare gloss readings with the approved project range. Check edges, corners, recesses, and hanging areas carefully. These locations often cure differently. A clean-looking panel can still fail. I have learned not to trust appearance alone.

Troubleshooting should follow evidence. Excessive orange peel may result from thick application, low part temperature, or poor powder flow. Pinholes can indicate trapped moisture, contamination, or inadequate outgassing. Craters usually require checking pretreatment, compressed air, and nearby materials. Poor adhesion demands a cross-hatch test and a review of cleaning and curing records. I once blamed the coating too quickly; the real problem was incomplete substrate preparation.

Maintenance begins with gentle washing and a soft, non-abrasive cloth. Remove chemicals, salt, and dust before they remain on the surface. Avoid harsh solvents unless compatibility has been verified. Inspect high-contact edges every few months. Record defects with photographs, thickness readings, cure conditions, and repair actions. Small records prevent repeated guesses.